Once a payment voucher has been approved,
the warrants for the invoices included on the payment voucher can be printed
or paid by EFT. Click here
for more information.
Zero amount warrants can't be printed; they
can only be voided.
Warrants are not considered paid in AptaFund until they have been verified.
Select Payment
Management from the Accounts
Payable menu, and the Payment Management
window opens.
Select an Approved or Pending voucher, and
select Warrant Printing from
the More menu. The Warrant Printing window opens.
Select the Bank Account No. from the pull-down
list if the default isn't the correct bank.
Check the First Warrant No. to make sure it's
correct, and change it if necessary. The check numbers will increment
by one per printed
check.
Select Regular
from the Payment Type pull-down
list.
Check the box(es)
to select New warrants to
print. Note: If there are
many warrants on the voucher, you may want to search the list or create
a filter to find the warrants to print. The Number field will be automatically
completed when the warrant is printed.
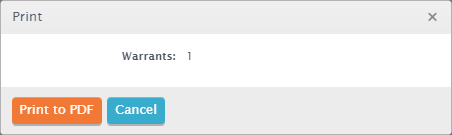
Click Print,
and the Print window opens, listing
the number of warrants you've selected to print,
Click the Print to PDF button. You're kept
notified of the progress, then the Save
dialog window particular to your browser opens.
Re-name the file
to give it a more descriptive title.
Navigate to the
location where you want to save the PDF, and click Save.
Once the PDF is saved, you'll see in the Print Warrants window that
the new warrant has a Pending status.
Open the PDF to
review the newly printed warrants and make sure they're correct.
If all the warrants
are correct, click Verify,
and continue with Verify
Now.
If one or more warrants are incorrect, click Close,
and continue with the instructions to Verify
Later. Note: You'll be
able to verify the correct warrants and reprint the incorrect ones
later.
Select Payment
Management from the Accounts
Payable menu, and the Payment Management
window opens.
Select an Approved voucher, and select Warrant Printing from the More menu. The Warrant
Printing window opens.
Select the Bank Account No. from the pull-down
list if the default isn't the correct bank.
Check the First Warrant No. to make sure it's
correct, and change it if necessary. The check numbers will increment
by one per printed
check.
Select EFT
from the Payment Type pull-down
list. The list now displays any available EFT payments.
Check the box(es)
to select New warrants to
pay. Note: If there are many
warrants on the voucher, you may want to search the list or create
a filter to find the warrants to print.
Click Pay,
and the Print window opens, listing
the number of warrants you've selected to pay.
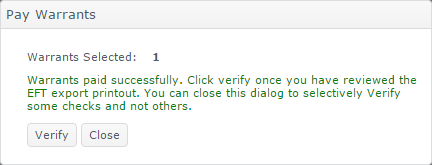
Click Pay
EFTs. The warrants are paid, and the Print
Warrants window notifies you of the successful printing.
Review the EFT Export printout.
If all the warrants
are correct, click Verify,
and continue with Verify
Now.
If one or more warrants are incorrect, click Close,
and continue with Verify
Later. Note: You'll be
able to verify the correct warrants and reprint the incorrect ones
later.
Remember: Warrants aren't considered
paid in AptaFund until they have been verified.