Create a Payment Voucher
The Invoices grid displays the Vendor Name,
the vendor that provides the goods or services, and a Payment Vendor,
the vendor that receives the remittance. If these are different, the warrant
payee will be the payment vendor, and the purchase vendor will receive
credit for the invoice.
Note:
When warrants are printed, if invoices for the same bank account for the
same vendor/employee are included on a voucher, they will be combined
into one warrant. If you do not want them to be combined, you must include
each invoice on a separate voucher.
Create a payment voucher
Select Payment
Management from the Accounts
Payable menu, and the Payment
Management window opens.
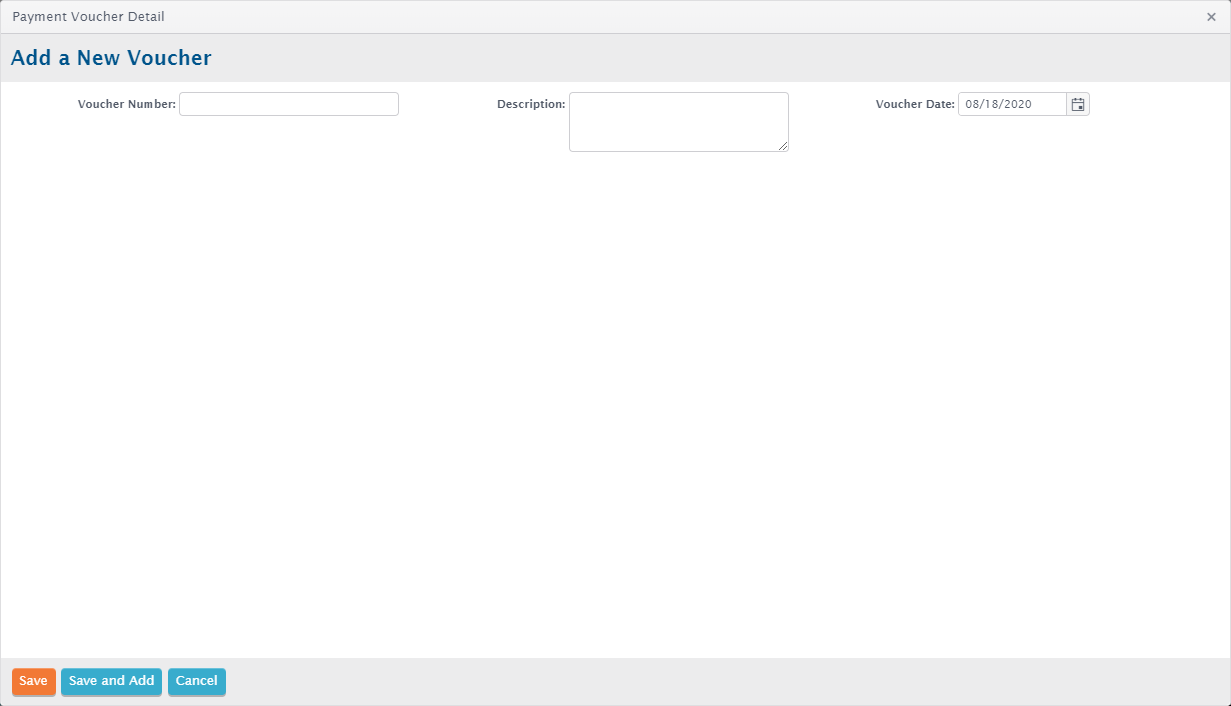
Click the Add button, and the Payment
Voucher Detail window opens.
Complete the fields
as described. Only the Voucher Number is required.
Click Save,
and the record is saved, and the Invoices grid
is displayed. The grid includes all invoices submitted for payment,
and all have the default status of Excluded.
Note: The
Invoices grid displays the Ordering Vendor — the vendor that provides
the goods or services — and a Payment Vendor — the vendor that receives
the remittance. If these are different, the warrant payee will be
the payment vendor, and the purchase vendor will receive credit for
the invoice.
Check
the boxes for the invoices you want to include, and click the Include Invoice button.
Note: If there are a lot of
invoices in the list, you may want to search
or create
a filter to make it easier to select the invoices to include.
For example you could create a filter to find all the invoices for
a single vendor, then select them all by checking the box at the top
of the column.
Click the Return to Payment Management link
in the upper right corner of the window, and you'll see the voucher
total displayed in the grid.
Return to Payment Management
Overview